Understanding Multi-Tenancy in Kubernetes
Summarize With:
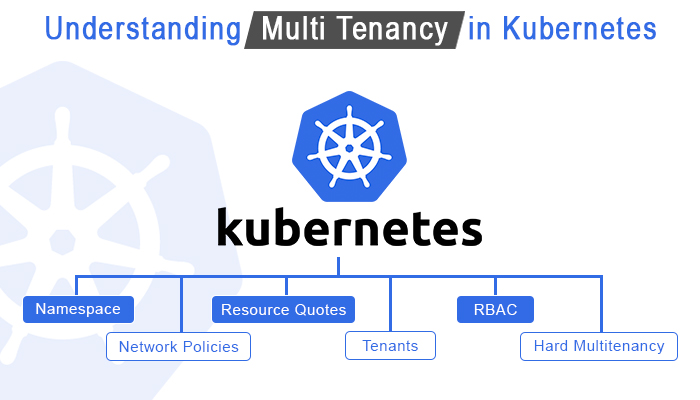
A container orchestration system is one of the most widely used automating software scaling, deployment, and management. Created by Google and managed by Cloud Native Computing Foundation, Kubernetes is an open-source container orchestration system used by legions of organizations. Container orchestration helps in operational tasks like networking, provisioning, and deploying in containerized workloads. Several organizations can use multiple workloads in a single Kubernetes cluster that shares the same infrastructure. This strategy used by enterprises is called multi-tenancy. This article is all about understanding multi-tenancy in Kubernetes, including its use cases, best practices, and how it helps organizations in the cloud-native space.
What is a Multi-Tenancy in Kubernetes?
Tenants are separate entities in an organization but share several shared components like infrastructure. Every tenant in an organization is given some shared components along with some isolation. Achieving this isolation can be done in multiple ways, like giving every tenant a unique server or virtual machine. Even though it is effective, the efficiency is compromised here as it will be costly and will not use the resources the right way. This is the part where multi-tenancy in Kubernetes comes into play.
Multi-tenancy is the capability to run different entities' workloads in a single cluster shared by different tenants. The organizations running multi-tenant clusters have to isolate each tenant to avoid any potential damage caused by a malicious tenant. In simpler terms, multi-tenancy is allocating an isolated space to an entity in a cluster while also giving some shared cluster components. This model is used in organizations running several applications in a single environment or where different teams exist but share a single Kubernetes environment.
Types of Multi-Tenancy in Kubernetes
- Soft Multi-Tenancy : Soft multi-tenancy is mainly done when numerous projects or departments are running in an organization or when there are trusted tenants. It can be implemented through the Kubernetes namespace multi-tenancy. In this type of multi-tenancy, the Kubernetes cluster is separated among different users but without extreme or strict isolation.
The primary reason why this type of multi-tenancy is implemented in the Kubernetes cluster is to assist with resource separation and avoid any accidental access to resources. As isolation is not strict in this type, deliberate attacks by one tenant on another cannot be prevented or minimized. This type is only preferred for trusted tenants in a Kubernetes environment with that thing in mind. - Hard Multi-Tenancy : Organizations having legions of tenants in a single Kubernetes cluster may have both trusted and untrusted tenants. Implementing hard multi-tenancy in Kubernetes applies much stricter isolation than soft mule-tenancy, hindering tenants from influencing each other.
Even the malicious tenants cannot affect any other tenants in the cluster. As this multi-tenant type comes with stricter isolation, enforcing it is also more complicated. The virtual cluster and namespace configuration is the tricky part of its implementation.
Single Tenancy vs Multi-Tenancy(How Multi Tenancy is different from Single tenancy?)
Both single and multi-tenancy are different from each other in many ways. Before you make your next move, it is crucial to understand the key differences each tenancy type will bring.
- Cost : Every tenant will have a unique cluster with a control plane, master nodes, monitoring, and other management components in a single tenancy. Implementing and managing a separate cluster with management components for each tenant is highly expensive, especially in a large organization with tons of tenants. On the other hand, multi-tenancy gives an isolated space to each tenant but on a single cluster where the organization can reuse resources, making it a cost-effective option.
- Complexity: Having a single cluster for each tenant is not just time-consuming but also complex. Even though the process can be automated through managed services, still it should be done for each cluster. A multi-tenancy method is less complicated as there is a need for setting up only one cluster for multiple tenants.
- Security: As there is a single cluster for every tenant, their isolation is natural; hence, none of the malicious tenants can affect any other. Due to this reason, a single tenancy is preferred for untrusted tenants. However, Kubernetes multi-tenancy security management can be a tussle as tenants share a single cluster. Though the security can be enhanced with Role-Based Access Control and hard multi-tenancy, still it is extra work that requires additional time and effort.
Multi-Tenancy Models in Kubernetes:
Kubernetes multi-tenancy models help in making its use cases easier and uncomplicated. Depending on the organizations and teams, these models can be implemented for the best outcome. Three most commonly implemented multi-tenancy models can be applied to projects.
- Namespaces-as-a-Service: In this model, every tenant shares a cluster where their workloads are restricted only to a set of namespaces allocated to the particular tenant. However, all the control plane resources, including the scheduler and AP server, CPU, and memory, are accessible by all the tenants across the cluster.
The namespaces-as-a-service model allows tenants to share all the cluster resources, hindering clusters from updating or creating any of such resources. When isolating tenant workloads, their namespace should contain role bindings, resource quota, and network policies.
Adding these to the namespaces is necessary as they help control access to the namespace, limit usage in the tenants, and prevent network traffic in all the tenants. - Clusters as a Service: In clusters as a service multi-tenancy model, every tenant is given a cluster where they can use cluster-wide resources. Moreover, they can have a Kubernetes control plane with complete isolation where management cluster projects are used to provision multiple workload clusters.
Furthermore, the tenants are provided with a workload cluster that provides complete control of the cluster resources. The central platform teams manage add-on services like security, monitoring, upgrading, patching, and cluster lifestyle management services. However, certain limitations exist for the tenant admin to modify the services above. - Control Planes as a Service: The control planes as a service variant of the earlier mentioned CaaS model. However, a tenant may be assigned a virtual cluster where they will be given an exclusive control plane. This model is applicable when the virtual cluster's users cannot determine the differences between a Kubernetes cluster and a virtual cluster.
Even though a virtual cluster is allocated to tenants, they still have to share worker node resources and certain control plane components. This model is implemented by a virtual cluster project where several VCs share a super-cluster.
Kubernetes Multi-Tenancy Use Cases
Here are the most frequently use cases of the Kubernetes multi-tenancy models:
- SaaS Provider Multi-Tenancy: The Software-as-a-Service control plane and the customer instance are the tenants of a SaaS provider's cluster. Every application instance is organized with its namespaces and the SaaS control plane components to take full leverage of the namespace policies.
Every end-user has to use the interface provided by SaaS, which communicates with the Kubernetes control plane. This process has to be followed by every user as they cannot communicate with the control plane directly.
The biggest example of SaaS provider multi-tenancy is a blogging platform running on a multi-tenant cluster. Here, the platform gives them a control plane, and their user's blog will have a separate namespace. The users can use all the services through its interface without viewing the operation of the cluster. - Enterprise Multi-Tenancy: When it comes to tenants in an enterprise, they are mainly different teams of the same organization that comes with a namespace. However, managing these tenants per cluster in an alternative multi-tenancy model is complicated.
Furthermore, the network traffic between tenants should be defined correctly. This task in multi-tenancy can be accomplished through Kubernetes network policy where the cluster users can be categorized into cluster-admin, namespace admin, and developer.
A cluster admin will handle the cluster and its tenants with authority to create, update, delete, and read any policy object. Moreover, they can also create and assign namespaces. The next is the namespace administrator, who will handle single tenants in the namespace. The last role is of the developer who can read, delete, create, and update namespace non-policy objects. However, this role is limited because their authority lies within their accessible namespaces. - Multiple Applications on a Single Cluster: There are stances when organizations want to host multiple applications on a single cluster. This need can be fulfilled through multi-tenancy, where you can host several related and unrelated applications that require a scalable platform but in a single cluster.
- Hosting Trusted and Untrusted Tenants: An organization has to work with both trusted and untrusted tenants that may be malicious. Without a doubt, the organization never wants to compromise tenants' security. This is the part where the multi-tenancy cluster comes into play. Here, the organization can share the infrastructure with both types of tenants without worrying about security. They can host apps needed by the internal teams along with the external entities that may require access to your cluster for workloads.
Best Practices for Kubernetes Multi-Tenancy
Kubernetes multi-tenancy can be used for many different use cases. However, the right practices must be followed to get the most out of it. With that in mind, here are some of the best practices for Kubernetes multi-tenancy.
- Cluster Personas: Creating a hierarchy of personas will maintain transparency within the process and avoid clashes in the team. Considering that fact, it is best to create a hierarchy of cluster personas based on the actions they can perform and the permissions they require to accomplish their tasks. There are four different personas in a multi-tenancy environment; cluster view, cluster-admin, tenant admin, and tenant user.
- Role-Based Access Control (RBAC): No matter from where the request originates, every create, read, delete, and update operation is done through the Kubernetes API server in multi-tenancy. When there are multiple tenants in a cluster, it is essential to keep it as secure as possible. Enabling Kubernetes multi-tenancy RBAC in an API server will help get better control over the applications and users in the cluster. Every RBAC has four API objects: Role, RoleBinding, ClusterRole, and ClusterRoleBinding. Furthermore, disabling attribute-based access control is also recommended.
- Namespace Categorization: In a multi-tenant Kubernetes environment, the namespace is among the most crucial aspects. One of the best practices regarding namespace is categorizing it into different groups. The most commonly used groups are system, service, and tenant namespace. The system namespace is exclusive for system pods, whereas the service namespace should run apps whose access is required by other namespaces in the cluster. However, a tenant namespace is a group used to run services and applications which do not need access from any other namespace.
- Label Namespaces: Another excellent yet underrated practice in multi-tenancy is labeling namespaces. This practice helps metadata applications to understand the reason for using resources. Labeling the namespaces will help understand the metrics whenever necessary or filter the application\'s data easily.
- Use Network Policy: In a multi-tenant environment, it is essential to isolate tenant namespaces. This can be done by using network policies that let the cluster admins control the communication of group pods. Admins should use network policy resources to isolate tenant namespaces.
- Limit Shared Resource Usage: When multiple tenants exist in a cluster, they are bound to use shared resources. Sometimes, these resources can be wasted by a tenant, reducing the outcome for other tenants. A great way to eradicate this issue is by limiting the shared resource usage by implementing Kubernetes namespace resource quotas. Through this quota, you can control the total resource usage by a single tenant.
Kubernetes Multi-Tenancy Cluster Setup
Experts recommend having a single large cluster in a multi-tenancy environment rather than having multiple small clusters for different tenants. Here is a quick guide on setting up clusters in a multi-tenancy environment.
Step 1: Partition cluster depending on the workload using namespaces:
The first step is to set up a cluster based on the development workload requirement. The basic cluster configurations come with four nodes with a single CPU and four gigabytes of RAM. This process includes setting up two teams in a cluster with a separate namespace for each team. Though the Kubernetes cluster comes with a default namespace, new namespaces can be created for the teams. For instance, the following namespace can be created for the leadership and virtual teams.
kubectl create namespace team-leadership
kubectl create namespace team-virtual
Furthermore, creating a sample application in these namespaces is also part of this step. This process will guide you in deploying an Nginx pod in the created namespaces using the below-mentioned command.
kubectl run app-leadership--image=nginx --namespace=team-leadership
kubectl run app-virtual --image=nginx --namespace=team-virtual
Step 2: Grant access control to the teams:
Once the namespaces and the applications are ready, it is time to provide them access control. To accomplish this task, the first thing to do is to create a service account for the team and assign the IAM role. Once that is done, you need to create a Kubernetes role with basic CRUD permissions. Moreover, you need to assign this role to the IAM service account created earlier in the process.
Step 3: Test the Access:
Now that the roles are assigned, the right practice is to test the access. To do that, you need to download the JSON key of the service account and try to log in. After you have successfully logged in to the service account, make sure to access the app in the namespace. Follow the same process for every namespace that you have created.
Step 4: Assign Resources to the namespace:
When there are multiple tenants or namespaces in a single cluster, they share some resources, so resource allocation is necessary. This allocation can be achieved by using ResourceQuota Kubernetes, which you will configure for namespaces regarding the resources they can utilize like total storage space, CPU, memory, pods, and services. You can restrict the resource utilization in each namespace so that none of the tenants overutilize resources.
Step 5: Resource Utilization Monitoring:
As you have already allocated resources to each namespace in the previous step, it is time to watch resource utilization. When new use cases are added to the namespace, the resource utilization may change. With that in mind, it is always advised to understand the resource usage pattern to make sure that every namespace gets the right amount of resources as per their usage.
What is Hypernetes in Kubernetes Multi-Tenancy?
Often, organizations run containers inside a VM to enhance its security. Undeniably, it is an effective method, but it comes with certain issues like the inability to manage container networks uniformly through the IaaS layer or the lack of centrally scheduled resources in containers. In that case, the alternative to this method is Hypernetes. A Kubernetes multi-tenant Distro adds a Hyper-based container execution engine, a container SDN network, cinder-based persistent storage, authentication, and authorization to the Kubernetes.
Furthermore, Hypernetes adds certain components to Kubernetes like isolated tenants managed by keystone, Layer 2 isolation network for tenants, isolation of containers through virtualization-based container execution engine, and persistent storage. Apart from that, Hypernetes provides numerous components based on Kubernetes through different plugins.
Conclusion:
Undoubtedly, using multiple clusters for each tenant is not a practical way of containerizing applications. The Kubernetes multi-tenancy has been proven to be an efficient way of storing applications. It is cost-effective but saves container setup time and a lot of resources as well. As multi-tenancy does not come out of the box in Kubernetes, organizations may require professional assistance. ThinkSys Inc can provide you with the unique strategies to implement multi-tenancy in Kubernetes that will expand its overall usability and attain efficient resource utilization. Furthermore, ThinkSys' dedicated Kubernetes toolset ensures effective multi-tenancy implementation in a cluster.
Frequently Asked Questions(Kubernetes)
Q1: What is a Multi-Tenant SaaS platform?
A multi-tenant SaaS platform is software that serves several customers on a single infrastructure and database. However, every customer's data is always isolated, which other tenants cannot access. They share all the shared resources but not their data.
Q2: What is a Multi-Tenant Schema?
A multi-tenant schema is when the application determines which schema to connect to for a tenant after connecting to a database.
Q3: What do you mean by Multi-Tenancy?
Multi-tenancy is when a single cluster serves multiple tenants rather than creating a separate cluster for each tenant. Every tenant shares the cluster along with the database. However, their data is always isolated.
Q4: What is Kubernetes Multi-tenancy?
A Kubernetes multi-tenancy is an architecture that helps run workloads of different entities in a single cluster but with isolation. Here, the workloads are also called tenants, which share the same cluster and its resources but are kept separate.
Q5: Is AWS Multi-Tenant?
The AWS supports multi-tenancy where SaaS applications can have multiple tenants with isolation. The level of isolation in Kubernetes multi-tenancy AWS and the shared resources is influenced by factors like domain nature, AWS services, and the multi-architecture model.
Q6: Can Kubernetes run on multiple machines?
Kubernetes has the ability that allows containers to run on several machines, be it physical, on-premises, virtual, or cloud. Moreover, these containers support all the major operating systems and share the same to run on multiple machines.
Q7: What is the difference between Single tenants and Multi-tenant?
The most significant difference between a single tenant and a multi-tenant is that the former will provide a separate database to a customer. In contrast, a multi-tenant can serve multiple customers with a single database. Multi-tenancy is proven to be cost-effective and resource-efficient for large organizations.
Q8: What is Multi-tenant deployment?
A Kubernetes multi-tenant deployment is when multiple software instances run on a single cluster. This cluster will have multiple tenants who will share the resources while being in isolation simultaneously.
Q9: What is a Multi-Tenant Cluster?
Several customers share a multi-tenant cluster called tenants. The cluster operators will isolate the tenants where they will allocate resources for each tenant depending on the requirements.